ponedjeljak, 4. kolovoza 2014.

[ROOT]Samsung Galaxy Core/Core Duos( I8260 / I8262)

Disclaimer: This guide is intended as a helpful How To. dotTech and its writers are not responsible for any gain or loss (including but not limited to bricked devices) incurred as a result of following this guide. Root your device at your own risk. Rooting may void your warranty.

Requirements

This guide is meant for the Samsung Galaxy Core, model numbers GT-I8260 and GT-I8262 and has been tested on Android 4.1.2 Jelly Bean firmware. You can check your device model number by going to Settings > About Device. 

Before We Begin

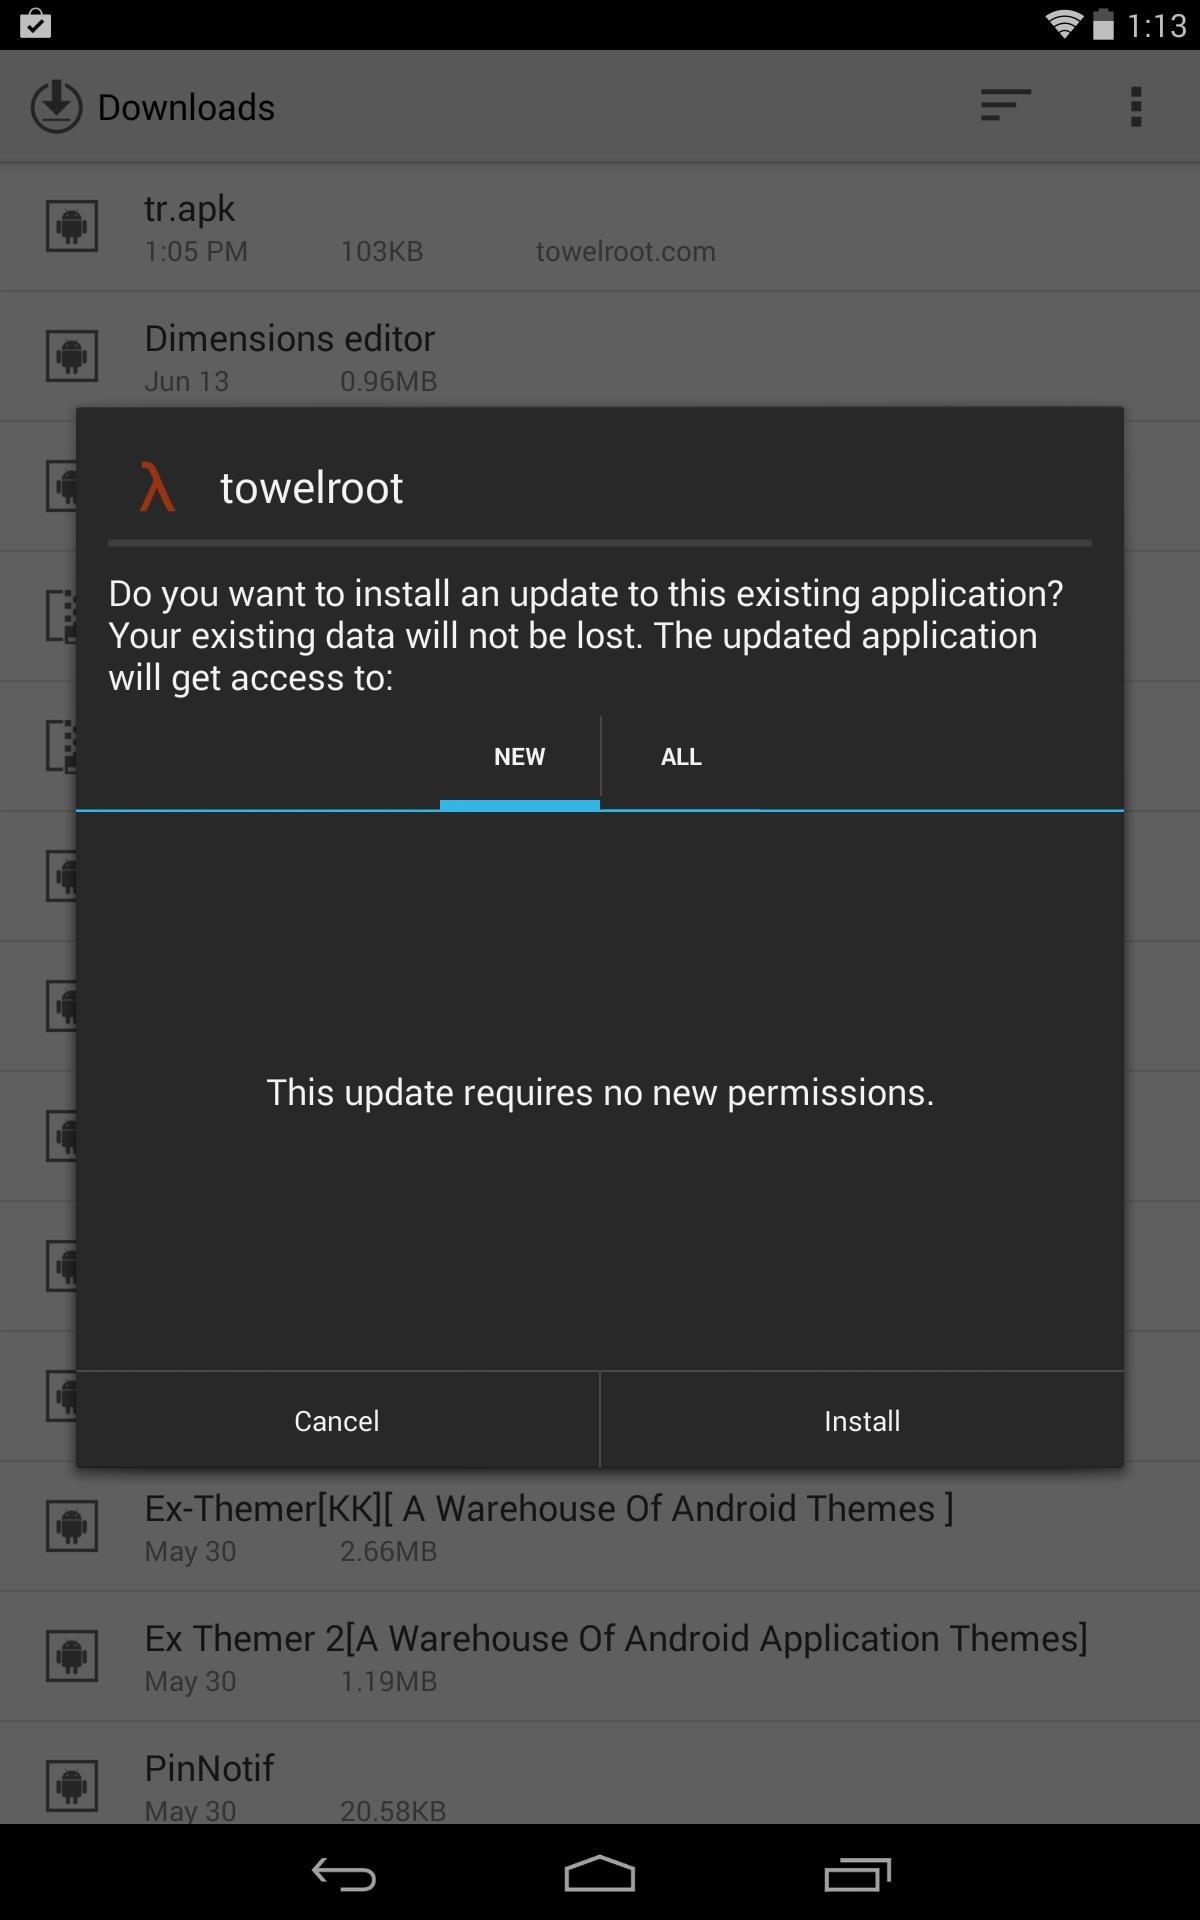
Download the Framaroot apk file from the link below and install it on  your phone.

How To Root Samsung Galaxy Core

  • On your phone, enable installation of apps from unknown sources. To do this, go to Settings > Security > Device Administration and check the Unknown Sources box
    Unknown Sources
  • Using a File Manager, navigate to the location where you copied/downloaded the Framaroot app on your phone earlier. Tap on the apk file to start installing Framaroot on your phone. Once installation is complete you should see the Framaroot icon in your app drawer
    Open Frama
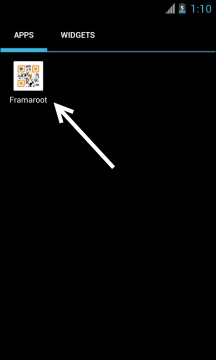
  • Tap on the Framaroot icon to launch the application
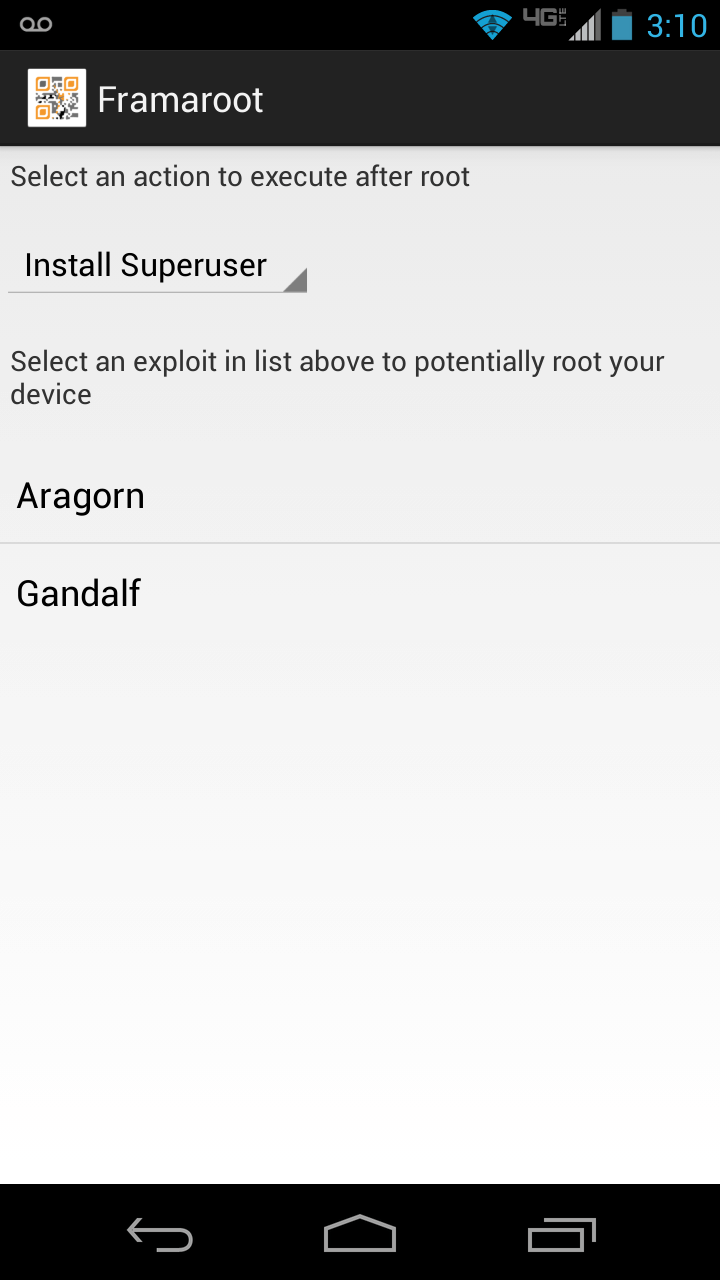
  • Once the app is open, you should see the main screen like in the screenshot below
    Framaroot exploit choice
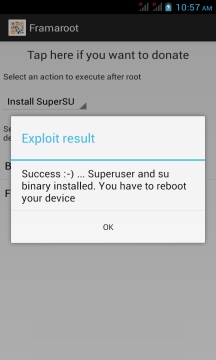
  • You should see some exploit options on the screen. Tap on Gandalf. This is exploit that the tool will use to root your device
  • After a few seconds, you should see a success message on your screen, like in the screenshot below
    framaroot success
  • Reboot your phone
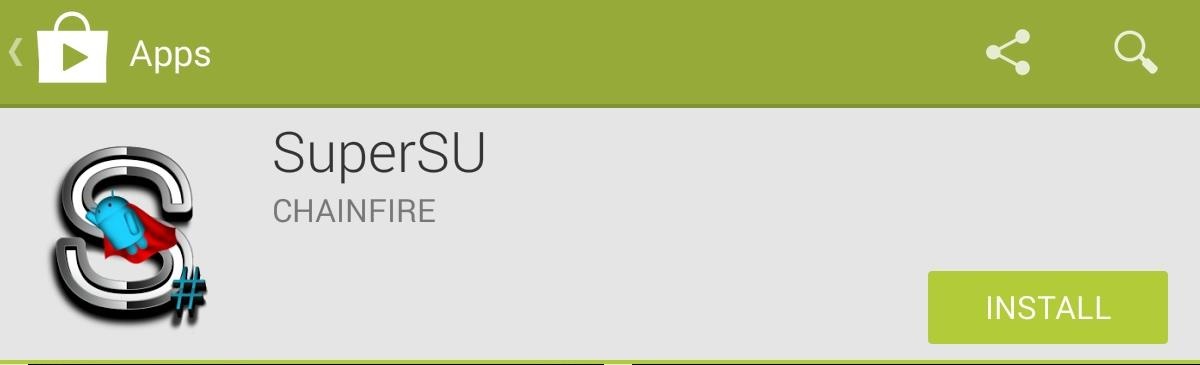
  • Once the phone boots back up, check the app drawer for the SuperSU app. Launch the app and update the binaries if prompted.
    SuperSu
Congratulations!!! Your Samsung Galaxy Core is now fully rooted and you can try various root-only apps to get the most out of your Android smartphone.

Read more at http://dottech.org/148596/how-to-root-samsung-galaxy-core-gt-i8260-gt-i8262-on-androud-4-1-2-jelly-bean-guide/#o7MsMXqYi7uYZSO2.99 (thanks guys)

[ROOT] Nexus 7 in less than two minutes

Step 1: Enable Unknown Sources

In order to acquire the application, enable "Unknown sources" on your Nexus 7. This will allow you to install an application from a source other than the Google Play Store.

Step 2: Download & Install Towelroot

Install the Towelroot APK from here onto your Nexus. Because of the way this exploit functions, you'll receive an intimidating warning when installing Towelroot, so make certain you understand the risks, then select Install anyway.

Step 3: Run TowelRoot

Open the application and tap the huge make it ra1n button. Your device will automatically reboot and be rooted!

Step 4: Verify Root

After it reboots, confirm root with an application like Root Checker.

Step 5: Install SuperSU

Although Roottowel will root your device, it will not install a root manager, which will prevent malicious applications from gaining root access, so installSuperSU off the Play Store from developer Chainfire.
You're now rooted and ready to roll. Geohot has rendered computers obsolete in the rooting process, and has made it so anyone can easily root their device and enjoy its true potential.

[ROOT] LG Optimus 4X P880 on any firmware!!


LG Optimus 4X HD P880 smartphone users will now be delighted to know that you can now root your smartphone so as to install the Jellybean 4.1.1 firmware in the form of custom ROM firmwares. We will be checking out a slew of custom ROM firmwares in coming days so that you can make the most out of them. Just in case if you are not aware of what exactly rooting means in Android, then rooting is nothing but it allows third party files to access the system level files so that the required customization can be done. The customization can be on the user interface front and also on the add on apps front which comes by default in the custom ROM firmwares.
The need for rooting is, unfortunately there is no ETA on by when there will be an official Jellybean 4.1.1 firmware update roll out but all thanks to the custom ROM firmware developers who have come up with some firmwares based on Android 4.1 and on Jellybean 4.1.1 versions.
Either with the help of below manual instructions to backup or with the help of PC Suite tools, you can create a backup of all the files present in your phone so that just in case if the data gets lost or corrupted, the same can be restored easily.
SMS – Use “SMS Backup & Restore app”,
Contacts – Sync with the Gmail application,
Call Log - Call Log and Restore
Images, Songs, Videos, Files – Copy to internal / External SD Card,
APN and MMS Settings – Note down from the path “Applications > Settings > Wireless and Network > Mobile Networks > Access Point Names
Head over to the path “Settings > Applications > Development > USB debugging”, enable the USB Debugging by selecting the appropriate option in your LG Optimus 4X HD P880. After this, disable all the antivirus suites installed in your phone as these tools generally interrupt the process of firmware update.
Make sure that minimum battery level is more than 50% or else there is a risk of device getting turned Off in the middle of firmware update.
Disclaimer: We should not be held responsible or liable for any damage happened to your device due to not following the instructions. It is very unlikely that there will be any damage to your device if you follow all the instructions.
So assuming that you are done with all the above mentioned tips, you can now head to the next step where we have summed up a detailed guide on how to root your LG Optimus 4X HD P880 smartphone.
Procedure to Root LG Optimus 4X HD P880 Smartphone:
  • First up, download and install the LG USB Driver in your computer as it will be required in the due course of rooting process. Up next, download and extract the Root kit (o4xr.zip) to “C:\o4xr”
  • Head over to the path “Settings -> Security” and make sure “Unknown Sources” is ticked. Disconnect the phone from computer if connected to the computer.
  • Now, go to the placed file “IS11LG_SystemBackupTest.signed.apk” and open the same to install in your LG device. Once installed, open the app named as “SystemBackupTest” which will be there in your Applications list.
  • Now, hold the press the power button to select “Power off and restart”. Now, connect your phone to the computer with the help of original USB cable. Make sure the phone is in “Charging Only” mode
  • In your computer, open the command prompt and ensure that you are right clicking on the command prompt to select “Run in Administrator mode”. Once the command prompt is started, enter the below mentioned commands one by one as mentioned,
cd C:\o4xr
root
  • Once you enter the “root” command, wait till the device completed the process and then you will see “C:\o4xr>” in the command prompt. Now, you need to disconnect the phone connected from computer.
  • Now, all you need to do is to just select the option of uninstall the “SystemBackupTest” app on your phone. (Please make sure that you are not opening the app, or else you will need to run the script again).
  • Download the “Super user” application from the Google PLAY Store and update all the SU binaries. To check on whether your phone is rooted or not, download and install the “Root Checker” app from the Google PLAY Store.
Big thanks to : http://androidadvices.com/root-lg-optimus-4x-hd-p880-firmware-tutorial/#.U-B-qOOSyVM

[ROOT] HTC One S

Step 1: Unlock
  • Go on http://www.htcdev.com and create yourself an account on HTCDEV.
  • Download These Fastboot Files
  • Make a new folder on your C:/ drive called fastboot.
  • Extract The Zip downloaded in step 2 to the new folder
  • Go Here http://www.htcdev.com/bootloader/ and select "All Other Supported Models" and "then begin unlock bootloader"
  • Yes, Tick both Boxes, Proceed
  • Skip up to step 8 as we have all we need for the first 7 steps
  • Power off your phone by holding the power button down for 10 seconds
  • Power your phone on by holding power and volume down
  • Highlight Fastboot With Volume+or- then press Power
  • Plug your phone into your PC and open a Command Prompt.
  • (windows XP - Click Start > Run > type CMD in box then press OK
  • (Windows 7 - Click Start > type CMD in search box then press Enter)
  • Change directory to your folder where we put fastboot files cd c:\fastboot
  • Type this into your command prompt window fastboot oem get_identifier_token
  • Select & copy the text as per step 9 on the HTCDev website
  • Paste your identifier token into the box at the bottom and submit
  • You Will Very Shortly Receive an email from HTCDev with a link to the second part of the instructions and your "Unlock_code.bin" attached
  • Download the "Unlock_code.bin" from the email and save it to the same folder that we extracted fastboot files to in step 2
  • Type this into your command prompt window fastboot flash unlocktoken Unlock_code.bin
  • The Display Will change on your phone, press Vol + to accept and power to confirm.

Thanks to bagofcrap24 for this part!

Step 2: Recovery

Step 3: Root

Make sure you are on the stock kernel!
  • Now root your phone with SuperSU by Chainfire, thanks a lot!
  • Download SuperSU from the end of the thread
  • Flash it with the Recovery:
  • Power off your device and then hold the VOL DOWN + Power to boot into the Bootloader
  • Navigate with VOL and Power to Recovery
  • Now flash the .zip:

    - install zip from sdcard
    - choose zip from sdcard
    - select the CWN-SuperSU-v0.87.zip file and flash it
    - Reboot now

Now you are able to flash any Custom ROM.

FROM: XDA-DEVELOPERS.COM (THANKS TO TORXX !)

nedjelja, 3. kolovoza 2014.

[ROOT]HTC One M8 (All-in-One Toolkit Method)

HTC One M8
By rooting (aka gaining admin rights to) your HTC One M8, you can install a custom ROM, run rooted apps, undervolt or overclock the processor and even remove all the bloatware your carrier put on the phone. A developer over on the XDA developer forums called Hasoon2000 has created a great toolkit for automating the process. Just change a few settings on the phone, install the drivers, click a few times in the toolkit and  you’ll open the door to an entirely new world of custom modifications, tweaks, and ROMs becomes.
Here’s how to root the HTC One M8:
Note: This method only works on Windows so you need a Windows computer to complete this procedure. 
1. Go to Settings > Battery Manager > Turn OFF Fastboot on your phone.
1
2. Download the latest version of the developer’s toolkit and save it to your Windows desktop.
2
3. Download and install WinRar so you can extract the .rar file from the developer.
3


4. Right-click the toolkit .rar file you downloaded earlier and select extract.
4 
5. Double-click the One M8 .exe file inside the newly created folder (and give it permission to open if it’s blocked by Windows).
5
6. Highlight Download HTC Drivers and click Go.
6

7. Install the drivers once they download.
7

8. Highlight Register at HTCDev and click Go.
8

9. Register on HTCDev (make sure to use a real email as we’ll need something sent to it later) and confirm your account.
9
10. Go to Settings > About > Software Information > More > Keep tapping on Build Number until it says you are a developer.
10
11. Go to Settings > Developer Options > Turn USB Debugging On.
11

12. Plug your device in via USB.
12

13. Check “Always allow” and tap OK.
13
14. Highlight Get Token ID and click Go.
14
15. Close the first command prompt when your device shows Fastboot mode.
15
16. Copy everything from and including <<<< Identifier Token Start >>>> to <<<<< Identifier Token End >>>>> and save it somewhere on your computer.
16
17. Highlight Submit Token ID and click Go.
17
18. Log in to the HTC Dev site when it appears and then go to HTCDev.com and click on Unlock Bootloader.
18
19. Choose your device from the drop down and click Begin Unlock Bootloader.
19
20. Skip all of the steps and just click Next until you get to the part where it asks you to input the Token ID.
20
21. Paste the Token ID we copied earlier into the text box and click Continue.
22
22. Save the Unlock_Code.bin file you receive by email to your desktop.
22-2
23. Highlight Unlock Bootloader and click Go.
22
24. Choose the Unlock_Code.bin file when prompted and click OK.
24
25. Use the volume buttons to highlight yes and the power button to select it when prompted by your device.
25
26. Reenable USB Debugging by going to Settings > About > Software Information > More > Keep tapping on Build Number until it says you are a developer.
10
27. Go to Settings > Developer Options > Turn USB Debugging On.
11
28. Highlight the recovery for your device and click Go.
28
29. Close the first command prompt when your device shows Fastboot mode.
15
30. Close the second command prompt when it says finished.
30
31. Use the volume buttons to highlight Reboot and push the power button to select it.
31
32. Highlight Perm Root under Extras and click Go.
32
33. Close the first command prompt after it shows something was transferred.
33
34. Tap on Install in recovery mode and tap the SuperSU.zip file.
34
35. Swipe to install it.
35
36. Tap Reboot > System.
36
37. You should see SuperSU in your app drawer if everything worked out. Enjoy!
37
 FROM: http://blog.laptopmag.com/root-htc-one-m8...........THANKS!!!